The Panasonic Lumix DMC-FZ150 is a new super-zoom camera featuring a wide-angle 24x zoom lens, 12.1 megapixel high-speed MOS image sensor, and 12fps continuous shooting without autofocus and 5.5fps with autofocus. Successor to the FZ100 model, the bridge-style Panasonic FZ150 compact also offers a 3-inch, 460K-pixel rotating LCD screen, full HD 1080p movie recording in AVCHD format at 25/30fps, Intelligent Resolution technology, Light Speed auto-focus, Nano Surface Coating lens coating, a range of creative effects, a port for an optional stereo microphone, and an accessory shoe for an external flash. The FZ150 also offers Power O.I.S anti-shake system, iA (intelligent auto) mode, manual shooting modes, 3D still images, RAW format support and an ISO range of 100-3200. The Panasonic Lumix DMC-FZ150 is available in black and retails for £449.99 / $499.95.
Ease of Use
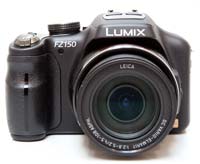
The Panasonic Lumix DMC-FZ150 shares an awful lot in common in terms of its external design with its predecessor, the FZ100, so some of the comments that we made in that review apply equally to this latest model. The FZ150 looks to all intents and purposes just like a proper DSLR camera, albeit one with a fixed lens and an electronic viewfinder. The Panasonic Lumix DMC-FZ150 is dominated by the non-interchangeable 24x zoom lens that provides an incredibly versatile focal range of 25-600mm. While this isn't quite as big as some of the FZ100's key competitors, in real-world use it provides enough width and enough reach to satisfy most photographer's needs.
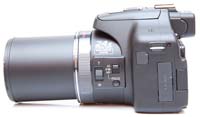
Panasonic's effective Power O.I.S (Optical Image Stabilization) is again on-board to help combat any unwanted camera shake, although you'll still need to use either a fast shutter speed or a tripod at the telephoto end of that massive zoom. When shooting video, Active Mode is automatically added to the POWER O.I.S. system. This compensates for the extra blur that can occur when you're walking and shooting video at the same time. The maximum apertures of F/2.8 at 25mm and F/5.2 at 600mm are pretty good for this class of camera. A stubby barrel with chrome detailing encases and protects the optic when not in use. Note that the lens extends by 6cms when it's fully zoomed and the camera measures almost 15cms in depth, making it quite conspicuous.
To help avoid lens flare, a detachable lens hood is supplied in the box, and there's also a clip-on lens cap that you can attach via a thread to one of the available catches for a shoulder strap. Panasonic have also applied a new Nano Surface Coating coating to the lens, which should further help to avoid any unwanted ghosting or flare effects. On the side of the lens barrel is a switch marked AF/AF Macro/MF. When MF is selected the focus range can be manually set between 1ft and infinity with the central portion of the frame enlarged so sharpness can be more accurately determined. Just below this is a dedicated Focus button that lets you set the focus point anywhere in the frame – useful should you be shooting for example in anything other than Intelligent Auto mode. The FZ100 now has a vertical zoom rocker on the side of the lens barrel, which provides an alternative way of zooming to the main fore-finger operated lever. It proves very useful for hand-holding the camera when shooting video, or for operating the shutter button with your right hand and zoom with your left, and is a thoughtful addition to the FZ series.
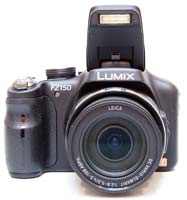
In being dominated by that big lens, the front of the FZ150 is very sparse looking, save for a lamp for the AF assist light/self timer to the left of the lens (if viewed head on). A good-sized hand-grip with tactile, leather-effect detailing houses the battery pack in its base. It's good to see a chunky lithium-ion rechargeable battery fitted as standard when some bridge models seem to think that four standard-quality AAs will suffice to get you going out of the box. Above the lens is a swift access pop up flash with a dedicated activation button sitting just behind it at the rear, and there's also a hot shoe for mounting a supplementary flashgun. The flash coverage offers a maximum range of 9.5m at wide-angle. On top of the pop-up flash is a very useful built-in stereo microphone which is retained from the FZ100.
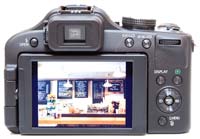
While this is not a camera for slipping into a pocket by any means, measuring 124.3 x 81.2 x 95.2 mm and being more at home in a small shoulder bag, the all-plastic Panasonic Lumix DMC-FZ150 certainly feels like it could withstand the odd knock and scrape of daily life. The camera feels solid and rugged in the palm, while at the same time portably lightweight at just under 500g – a slightly contradictory sounding summation that translates as build quality being 'just as it should be'. It's also pleasing also to find a viewfinder – here electronic (EVF) – which is 0.20" in size, offers 100% field of view and 201K dots, although disappointing that it doesn't improve in any way on the FZ100's viewfinder (or the FZ38 before it). There's also a prominent eye relief that juts out clear of the LCD so that you don't automatically smear your nose all over the monitor when you put your eye close to it. A dioptre adjustment wheel is immediately adjacent, enabling the short sighted to use it without clashing spectacles.
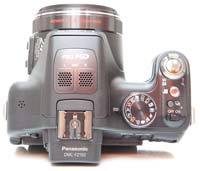
Moving to the top of the FZ150, the controls start to get a little busier, but not overwhelmingly so. Here you find a comprehensively featured black mode wheel with 14 shooting options. This demonstrates a nice firm action as you twist it around to your chosen setting, and a definite click as you line up each one. Ranged around the wheel are the usual suspects of program, aperture priority, shutter priority and manual modes, movie mode, scene modes, night scene, sports, landscape, portrait, plus one for attributing your own custom settings, and Panasonic's much talked about and copied Intelligent Auto Mode.


Panasonic have tried to make things as easy as possible for the complete beginner by providing this shooting mode, which allows you to point and shoot the camera without having to worry about choosing the right mode or settings. Intelligent Auto Mode automatically determines a number of key criteria when taking a picture, including selecting the most appropriate scene mode (from 5 commonly used presets) and ISO speed, and turning face detection (up to 15 faces, even sideways on), image stabilization and quick auto-focus on. The Intelligent Auto Mode includes Intelligent Exposure, which increases exposure only in the under-exposed areas of the image, Digital Red-eye, which automatically detects and removes red-eye, and AF Tracking, which continually tracks a moving subject and keeps it in focus, without you having to hold the shutter button halfway down as on most other cameras.
Face Recognition is a fun and genuinely useful new feature which "remembers" up to 6 registered faces and then always prioritizes the focus and exposure for that person in future pictures. Very useful for group shots where you want your loved ones to be the centre of attention. You can specify the age of the registered subject, stamp the age of the subject onto your photos, change the focus icon for a particular person, and playback only the photos that contain a certain face. The camera will even automatically switch to Baby mode if someone registered as less than 3 years old appears in the frame!
The Motion Deblur mode is an automatic combination of Intelligent ISO Control and Intelligent Exposure. The former automatically adjusts the ISO setting and shutter speed according to the subject’s movement while the latter optimizes the exposure. The FZ150 then sets the appropriate shutter speed to keep the subject sharp, raising the ISO speed if necessary. Three different Colour Effects are available in iA mode, including the rather curious Happy mode, which optimizes color, saturation and brightness to make both photos and movies more vivid. Note that the camera's Intelligent Resolution technology is always activated in the iA mode. This makes a standard image look like a higher resolution one by processing the contour areas, texture areas and smooth areas individually, and it also digitally boosts the zoom magnification from 24x to 32x.
In practice the Intelligent Auto Mode system works very well, with the camera seamlessly choosing the most appropriate combination of settings for the current situation. The 6 available scene modes are Macro, Portrait, Scenery, Night Portrait, Night Scenery and Sunset, so obviously not all situations are covered by Intelligent Auto Mode, but it does work for the majority of the time. It makes it possible for the less experienced photographer to easily take well-exposed, sharp pictures of people, scenery and close-ups by simply pointing and shooting the camera. In addition to Intelligent Auto, also catering for the beginner are a total of 22 scene modes.
Intelligent Resolution performs two main functions - it either makes a standard image look like a higher resolution one by processing the contour areas, texture areas and smooth areas individually, or it digitally boosts the zoom magnification from 24x to 32x with minimal loss of quality and no reduction in resolution. In both cases, it's easy tell which image was taken with Intelligent Resolution turned on and which ones with it turned off, particularly if viewing onscreen at 100% magnification, as our test shots on the Image Quality page show. The difference isn't quite so apparent on a print up to A3 in size, but I'm not convinced enough to recommend it except when you really need the extra reach - it undoubtedly improves on the digital zoom, but not so much that I'd regularly use it. In addition the Extra Optical Zoom function can be used to extend the zoom range to 50.6x by using the center of the MOS sensor, although with a reduction to 3 megapixel resolution.


Also worthy of mention are the white-balance options. As well as the usual range of presets and Auto options, you can set the camera using two measured white balance settings, providing useful shortcuts if you commonly shoot in mixed lighting conditions not covered by the presets. In addition, the Colour Temperature option allows you to dial-in an exact Kelvin value - you effectively get a white-balance preview via the LCD screen.
New to the DMC-FZ48 is the 3D Mode option. When selected, the camera instructs you to pan 10cms from left to right, during which it takes 20 consecutive shots at high-speed, another benefit of the high-speed sensor. It then automatically selects the best 2 shots from the sequence to create a 3D image. You can only view the results on a 3D TV (the FZ48 records standard MPO files), and although it isn't as effective as images taken with Panasonic's 3D Micro Four Thirds lens or the Fujifilm 3D W3, for example, it does create quite a convincing effect which particularly suits subjects that are close-up to the camera.
There's a useful Motion Picture button on the top of the FZ150 that can be operated with your forefinger. As you'd expect, it allows you to start recording a movie with a single push of a button, and then stop recording by pressing the same button, regardless of which shooting mode is currently selected. This is much quicker and more intuitive than having to select the movie mode then press the shutter button, as on most cameras.
The FZ150 can record full HD 1920 x 1280 60p (NTSC) / 50p (PAL) movies at 30/25 frames per second at either 17Mbps or 13Mbps in the AVCHD (MPEG-4/H.264) format, and also 1280 x 720 at 30fps. In addition it can also record Motion JPEG movies at 320 x 240 at 30fps, 640 x 480 at 30fps, 848 x 480 at 30fps and 1280 x 720 at 30fps, useful as this format can currently be shared more easily. Taking advantage of the MOS image sensor is the High Speed Movie scene mode, which as the name suggests records high speed movies at 220fps in QVGA size. AVCHD features almost double the recording time in HD quality compared with Motion JPEG, but software support is currently a bit thin on the ground. Panasonic describe it as the best mode for playing back on a HD TV direct from the camera, and Motion JPEG best for email and playing on a computer.
The Creative Movie shooting mode allows you to set the shutter speed, aperture or both settings manually during recording (a Program option is also available). Changing the shutter speed is especially suitable for shooting fast-moving subjects, whilst the ability to control the aperture is convenient when there are several subjects at different distances. In practice this system works well, allowing some really creative effects, but there are a couple of major drawbacks. Firstly the operating sound of the control dial is very audible in the movie, so you'll need to edit the soundtrack later to remove it. Secondly, you can't set the shutter speed to below 1/30 seconds, instantly ruling out more creative slow shutter-speed effects.
The Panasonic FZ150's Intelligent Auto mode also works in movies as well as for still photos. Simply select iA on the mode dial and press the Motion Picture button. The Intelligent Scene Selector automatically determines the most suitable Scene mode from Normal, Portrait, Macro, Scenery, and Low Light, Face Detection automatically detects a face in the frame and adjusts the focus, exposure, contrast, and skin complexion, Intelligent Exposure continually checks the ambient light level and adjusts the exposure setting as conditions change to prevent blown highlights and blocked shadows, and the POWER O.I.S. (Optical Image Stabilizer) and Motion Deblur mode help prevent blurring from hand-shake when using the zoom lens.
Stereo sound is recorded during video capture via the large internal mic on top of the camera, which is a big improvement on the rather muffled noises recorded by most digital cameras, helped by the wind cut function which blocks out most of the noise from background wind. For more creative sound recording, an optional stereo microphone (DMW-MS1) is available. The HDMI port allows you to connect the FZ150 to a high-def TV set, but only if you purchase the optional HDMI mini-cable. You can simultaneously take still images while recording movies, although only at a reduced resolution of 3.5-megapixels, while the Video Divide function divides the video into two sections to shorten or delete them in-camera.


You can use the zoom lens during recording and really make the most of that versatile 25-600mm focal range, although the zoom speed is quite a bit slower than for still images. Focusing is set via the Focus mode dial on the top of the camera. On the negative side, you'll find that if you choose continuous auto-focus, areas of the video will be blurred before becoming sharp again as the camera tries to refocus. On a more positive note, the the FZ150 is quite fast at re-focusing, and having this system is much better than not being able to auto-focus at all. Hand-holding the FZ150 during movie recording inevitably leads to some camera shake, despite the combination of the optical image stabilizer with special Active mode, so for best results you'll need a dedicated video tripod or steady hands.
Adjacent to the shooting mode wheel is an Off/On slider switch. Flick this to On and the camera powers up in just over 1 second, the rear LCD bursting into life and that zoom extending to maximum wide angle setting, slightly proud of its protective barrel. The Panasonic Lumix DMC-FZ28's new Light Speed auto-focus system lives up to its name and is very fast to determine focus at around 0.1 seconds, plus there's virtually no shutter delay to speak of when you take a shot, with full 12 megapixel resolution JPEGs committed to memory in just over a second. Located just in front of the slope that forms the top of the camera grip is the main shutter button. Springy to the touch, this is encircled by a lever for operating the zoom, the action of which is impressively smooth and mechanically quiet.
The FZ150's high-speed MOS image sensor allows for some impressive continuous shooting speeds. Enabled via the Burst mode button on top of the camera, you can take 12 frames per second for up to 12 images. Note that continuous auto-focusing isn't available at the 12fps rate, only single auto-focusing, which can make it tricky to keep fast-moving subjects sharp. AF-Continuous is only available at 5.5fps or 2fps. Even faster rates of 40 and 60 fps are available, albeit at reduced resolutions of 5 megapixels and 2.5 megapixels. Perhaps most impressive of all, these continuous rates apply equally to both JPEG and RAW images, so there's no speed penalty when shooting in RAW other than having to wait longer for the camera to process all the images.
As with all current Panasonic models, the FZ150 has an anti-shake system, on this model the Power O.I.S. variant. Turn it on via the Stabilizer option in the main menu and the Panasonic Lumix DMC-FZ150 automatically compensates for camera shake, which is a slight blurring of the image that typically occurs at slow shutter speeds when the camera is hand held. There are three different modes, Mode 1 is on all the time including image composition, Mode 2 is only on when you press the shutter button, and there's also an Auto mode. In practice I found that it does make a noticeable difference, as shown in the examples on the Image Quality page. You don't notice that the camera is actually doing anything different when anti-shake is turned on, just that you can use slower shutter speeds than normal and still take sharp photos. Thankfully leaving the anti-shake system on didn't negatively affect the battery-life, with the camera managing just over 400 shots using the supplied rechargeable Li-ion battery.
The High Sensitivity mode also helps combat the effects of camera shake. When this scene mode is selected, the camera automatically raises the ISO speed from 1600 up to a maximum of 6400 and therefore allows for a faster shutter speed. This mode allows you to handhold the DMC-FZ150 without using the flash and get more natural results, whilst at the same time freezing subject movement more successfully. There are some obvious drawbacks with this special scene mode, principally a significant reduction in resolution to a maximum of 3 megapixels in the 4:3 aspect ratio, and the Quality is also set the the lowest level. The user guide states that "you can take pictures suitable for 4x6 inch printing" using the High Sensitivity mode. You also need to select the right scene mode and therefore have some idea about when it is applicable to your subject.
The Intelligent ISO menu option is the third way in which the DMC-FZ150 attempts to avoid subject blur in low-light conditions. The camera automatically sets the appropriate shutter speed AND ISO speed for the subject that you are taking pictures of. So if you're taking shots of a child indoors, the DMC-FZ150 automatically raises the ISO and in turn the shutter speed to avoid blurring the child's movement. If the subject is still, then the camera chooses a lower sensitivity and slower shutter speed. It's a clever idea that works well in practice, with the camera generally choosing an appropriate combination of shutter and ISO speed. You can also limit the maximum ISO speed that the camera can choose, which I'd strongly advise, as the fastest available setting of ISO 1600 produces very noisy images - ISO 800 is a better choice.


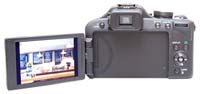
Moving to the rear of the Panasonic Lumix DMC-FZ150, the left-hand side is dominated by the 3.0-inch, 460,000-dot free-angle LCD screen. The rotating, free-angle LCD monitor, which is hinged on the left side of the camera (looking from the rear), can be flipped out and twisted through 270 degrees. You can use the screen as a waist-level viewfinder, holding the camera overhead, and even for turning the FZ150 on yourself for arm-length self-portraits. There's also the added benefit of folding the screen away against the camera body to protect it when stored in a camera bag, preventing it from becoming marked or scratched. The high-res, free-angle LCD screen is much more than just a novelty - it's a lot more versatile than the usual combination of optical viewfinder and fixed LCD, providing new angles of view and enhancing your overall creativity. Above all, it's a fun way of composing your images. The screen is bright and clear as a means of composition whether shooting inside or out, and if visibility does suffer in sunlight there's the option to switch to the electronic viewfinder via the dual EVF/LCD button on the camera's rear, though 90% of the time the LCD was my preferred method of composition.
Above the LCD screen and to the right of the viewfinder, just like you'd find on a budget DSLR, is the aforementioned EVF/LCD and a useful AF/AE lock button. Alongside and falling naturally under your right thumb is a very welcome rear control dial for easily changing the aperture and shutter speed. Depending on which shooting mode is currently selected, this dial can also be pressed in to switch to setting the exposure compensation. Beneath the control dial is the Display button. A quick press either activates or deactivates the number of shooting settings displayed on screen, calls up a live histogram alongside them or displays a nine zone compositional grid for those experimenting with the Rule of Thirds. Next to this is a self-explanatory Playback button, and underneath a familiar four-way control pad that you'd expect to find on most digital cameras.
At its heart is a Menu/Set button, for calling up the user-friendly if uninspired looking regular menus on the LCD screen. The menus comprise three separate folders; the first for shooting/playback options – dramatically pared down if you're using Intelligent Auto mode – the second for Motion Picture options and the third for the generic set up menu. A subsequent press when you've located the various options goes on to effect any changes, which are quick and precise. Ranged around this central menu/set button are four pads. Although these are used for tabbing through menu options or captured images, press them when in capture mode (and you haven't summoned up a menu) and, starting from the top, you find an exposure compensation button, one for accessing the ISO speed, a third for the Function option, which can be configured to activate one of seven key settings, while the fourth provides access to the self timer options.
Underneath the four-way control pad is a combined Quick Menu / Delete button. This opens a pull down Quick Menu containing a smattering of useful settings appears on screen to save you having to delve into the main menus for similar. This enables on-the-fly access to an Aladdin's cave of options, including the likes of film mode, flash modes, metering (spot, centre weighted and average), auto focus areas (or opt for face detection mode), white balance, aspect ratio, image resolution and image quality, movie recording quality and LCD mode. Like other Panasonic Lumix compacts you get the choice here to brighten the overall display ('power LCD' mode) or opt for the more useful high-angle setting, which aids screen visibility when you're holding the camera at arm's length for a shot over the heads of a crowd. The same button is also marked with the familiar trashcan icon for deleting unwanted shots quickly.
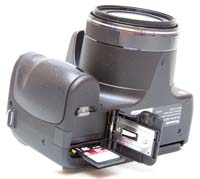
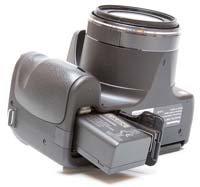
At the base of the FZ150 we find a metal screw thread for a tripod, alongside which is a sliding compartment that houses both the chunky rechargeable battery – necessarily providing a good long life as there's no optical viewfinder to fall back on as a power saver – and a slot for an optional SD / SDHC card. The right hand side of the camera has a slot for threading through a strap, as does the left, which also houses an AV out / Digital port and an HDMI socket for connecting the FZ150 to a HD television or monitor. Unfortunately, Panasonic have decided to cut costs and not include either a component or HDMI cable as standard in the box, which means that you'll have to purchase one separately to take advantage of this camera's HD connectivity. There's also a compartment for the optional Microphone and Remote Control accessories.